
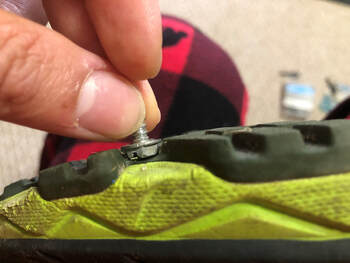
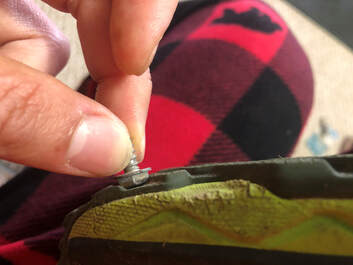
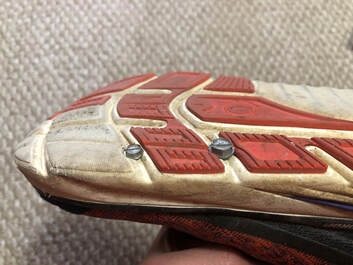
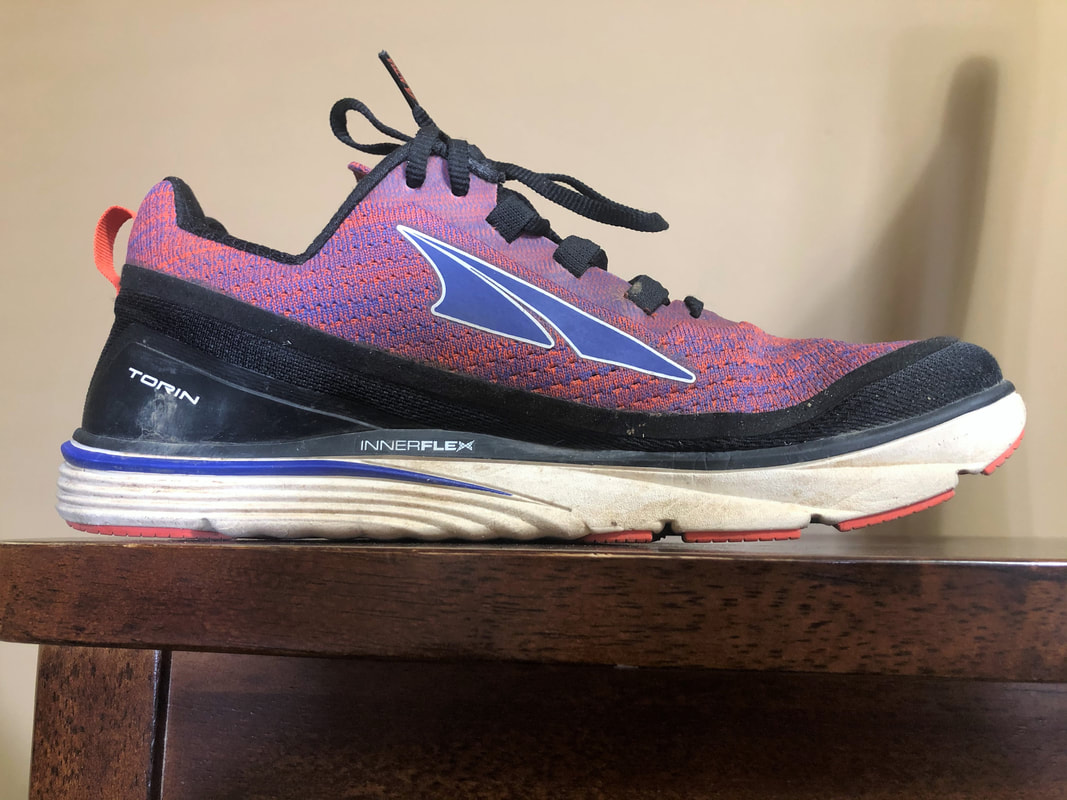
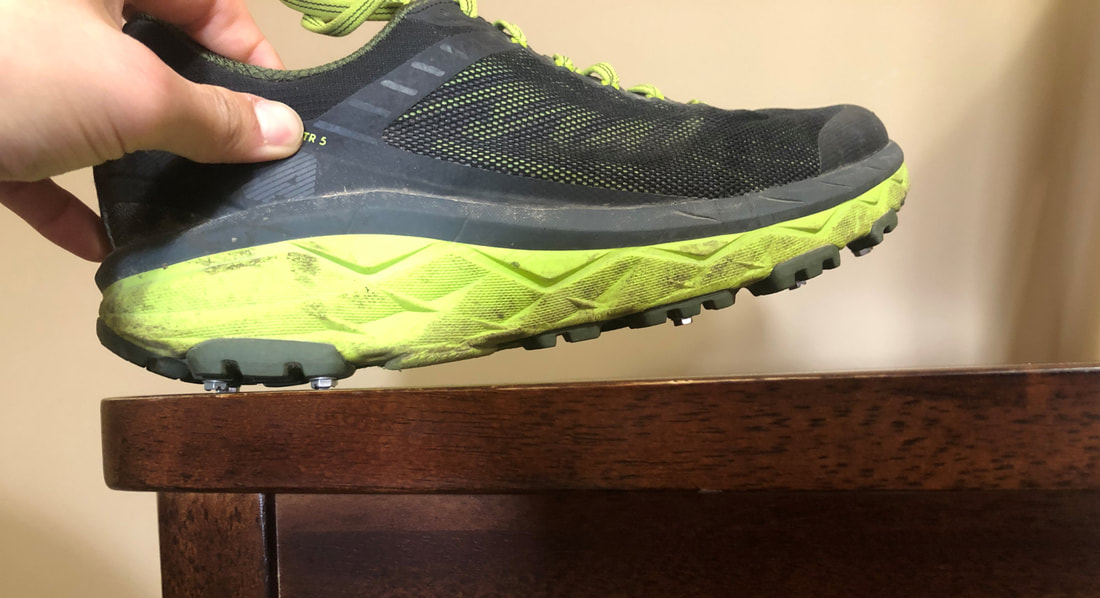
IntroductionRunning during the winter months and in the early spring may be great core work, especially as you try not to slip and fall when running on packed snow and ice! There are several ice/snow traction devices for sale out there but my personal favorite, as a DIY'er, has always been Screw Shoes. I like this traction method for these main reasons - 1) effectiveness (they really do bite into the ice!), 2) cost (hex screws are super cheap!), and 3) highly customizable (screws can be placed in any configuration you want!). Matt Carpenter already wrote an excellent article on How to create your own Screw Shoes so my main goal here is to (hopefully) get more into the nitty-gritty on my super-detailed personal process for what size screws I choose, how I decide where to place screws and how many as well as any tips. I am going to show 2 examples to highlight some differences on how outsole design influences where I put choose to put in screws - 1 with a road shoe, which does not have aggressive or pronounced treads (Altra Torins), and 1 with a trail shoe (Hoka Challenge ATR 5), which have more pronounced treads. The key point is to experiment, experiment, experiment!! As screws are cheap, it's a lot more affordable to try out a bunch of things and see what works for you! Let's jump into it! Screw SelectionScrew size choice may be purely personal preference as well as terrain dependent. I tend to like the smaller #6 screws vs the #8 screws that Matt references in his article. This may be because I run more on roads (which get icy, with a little less packed snow) as well as smoother, less technical trails than maybe Matt does. You may need bigger, beefier screws, if you are running in the mountains of CO or in lots of packed snow. Note: You don't have to use only one screw size!! I sometimes use a combination of #6 screws (less obtrusive on the balls of the feet in front) and #8 screws (towards the rear of the shoe for more traction). Experiment! 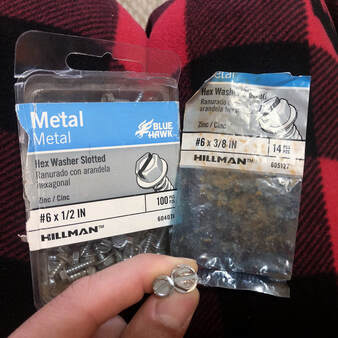 #6 hex screw on the left, #8 hex screw on the right I recommend 3/8" or 1/2" lengths but be sure to do a rough measure of the thickness of your midsole/outsole to make sure you don't screws that are too long. If you are lighter on your feet and do less pushing off, you can probably get away with shorter screws without them popping off. So far, I have not really had a screw pop out on me yet. *knock on wood* 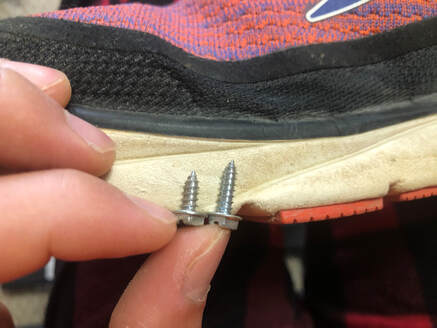 3/8" on the left, 1/2" on the right (Altra Torins are high cushion shoes so they have a lot of midsole material) Screw size also determines the height of the screw head, which may be a factor in how and where you place your screws. Screwing onto the lugs provide the most protrusion, which can be helpful in packed snow. I don't think you need more than a couple of mm of screw head for it to be able to "bite" into the ice. Screwing in between the lugs may give your outsole a bit more life as well as be able to leverage your outsole lugs (if you have them) for traction in regular or packed snow.
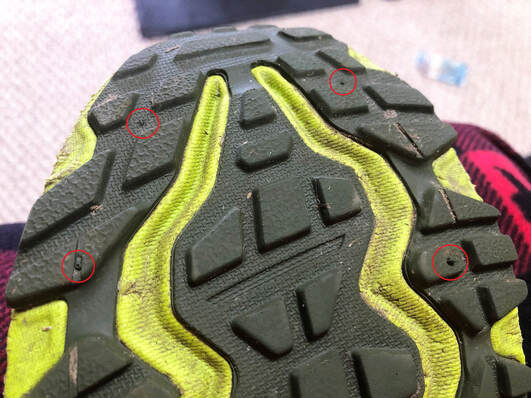
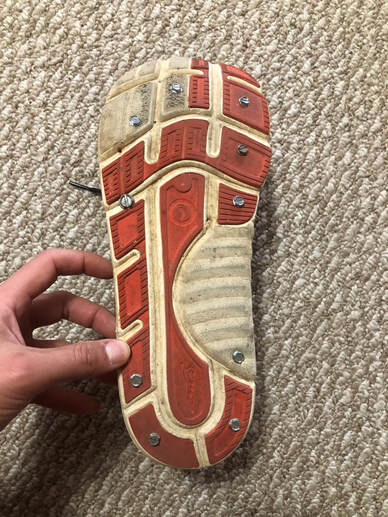
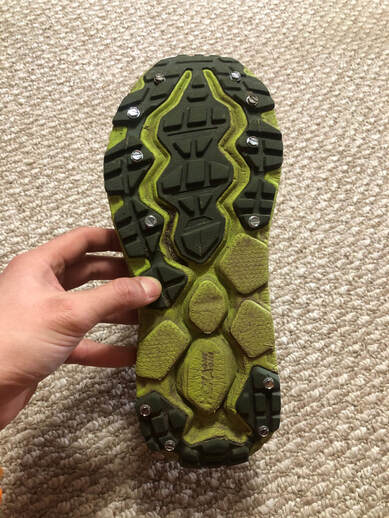
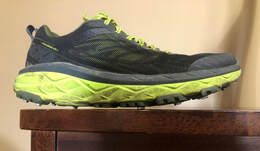
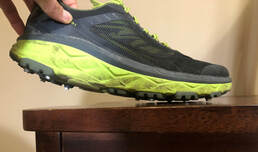
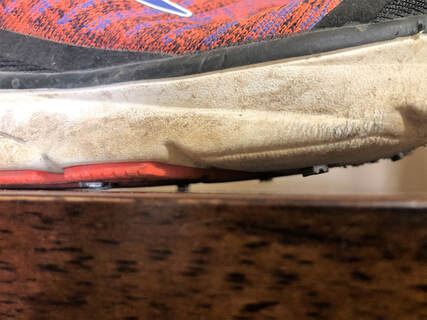 Place your shoe on a flat surface after screw installation to quickly review screw protrusion and surface contact. How much protrusion do you really need? Definitely more for packed snow, potentially less for ice. Screw PlacementFrom my experience, a good first step in determining screw placement is to review your shoe wear patterns, which can indicate where your feet usually contact the ground (are you a heel-striker/scuffer, like me, or a mid/fore-foot striker) and where your feet pushes off the ground. Those are the points where you can benefit the most with added traction. Usually the middle of the shoe does not need many screws, if any, because the balance phase of the gait/stride mechanics has the force directed perpendicularly to the ground so (in that split-second) your foot really isn't going anywhere, until it transitions into the push-off phase (and then you will need traction again). 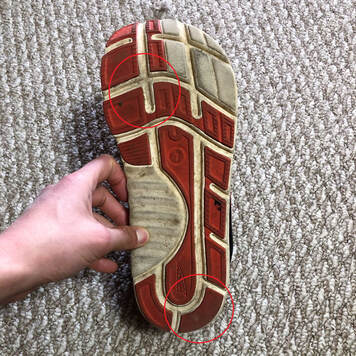 Areas of highest shoe wear (circled in red) usually indicate where screws could be placed for maximum efficiency. Take terrain or gradient into account as well, if you run on hills a lot. Most people tend to transition to a heel strike on downhills (as they lean back a bit) and go up on their forefoot when going uphill. Since I'm going downhill a lot faster than I am going up, the consequences for me slipping and falling on a downhill are probably more severe so I definitely emphasize some beefier screws on the back. The number of screws is pretty much personal preference. More is not necessarily better, especially if they start to interfere with your stride mechanics. Matt in his article uses 16-18. I personally have found that to be too much, especially in the middle forefoot area, and have found 10-12 to be a happy medium. I usually go 6-8 in the front and 4-5 at the back.
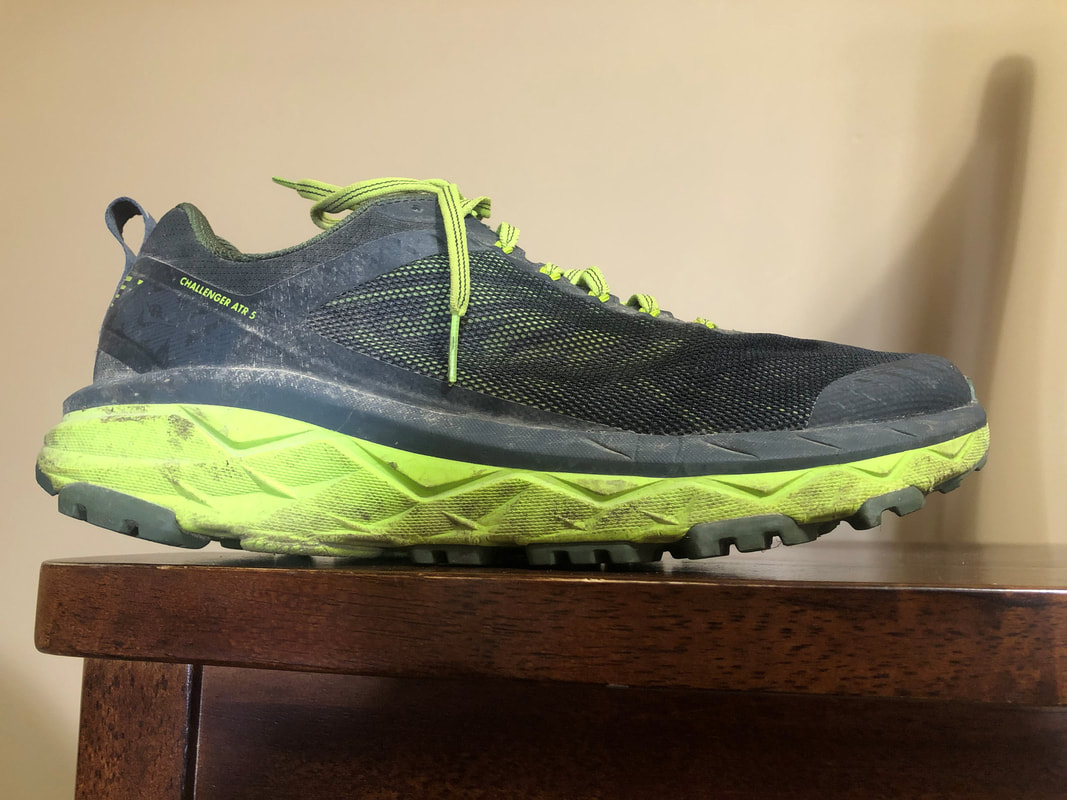
 Note the difference between where I drill the screws in between the textured lug parts vs directly on the lugs themselves. Again, this is mainly to preserve outsole life for added shoe longevity. Every little bit helps! It also helps to take into account the shape of the shoe and how that affects your gait. The Hoka Challenger (below, left) has more of a distinct rocker shape than the Altra Torins (below, right). This means there is less of a mid-stance, balance phase and any screws placed on the heel will definitely have less, if not zero, impact when transitioning from rear-foot to fore-foot. This means that you may need a few screws closer to the middle of the shoe. If you have a thinner shoe or a shoe with less cushioning or less stiffness, this may start to rub into your arch so just be aware.
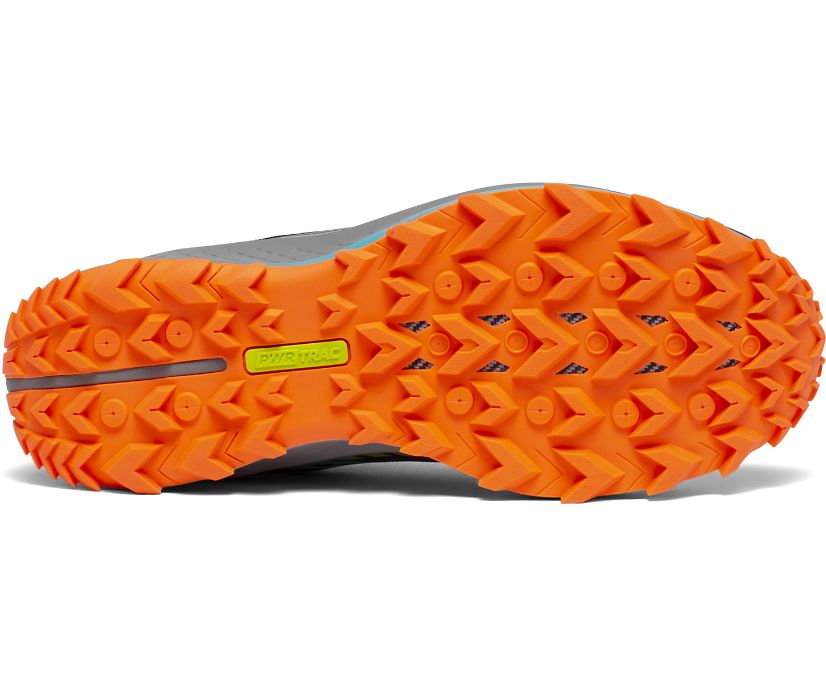
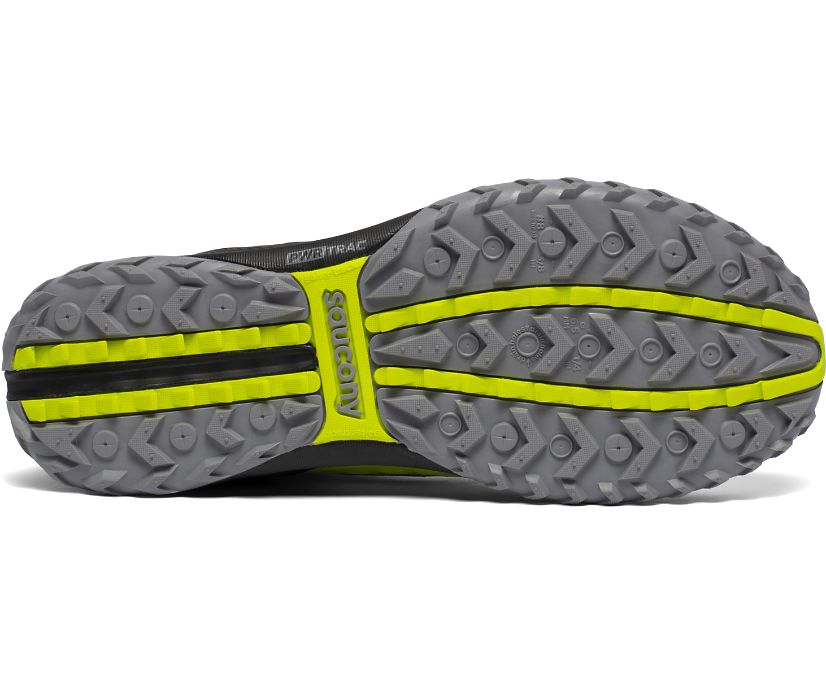
Here are a few tips! 1. Many shoes have deceiving outsoles/midsoles where your foot actually sits lower in the shoe than the midsole height from the outside will lead you to believe. Remove your insole BEFORE you start screwing the screws in so that, in case you select screws that are too long, they don't rip through your insole. You can also run your hand into your shoe to feel for any bumps or actual screw protrusions. 2. Experiment, experiment, experiment! After initial screw installation and before you first real run, take your screw shoes out for a few steps or a short run around to see if your screws are pushing on your feet in an uncomfortable way. Good news is, if there are, you can just move them! Customizability, FTW! 3. There are now trail shoes with features built in to optimize customizability like the Saucony Peregrines and Mad River TRs. These shoes now have spots, specifically for users to install #8 screws as well as drill out additional drainage holes (which is a tip/hack for another post!). This could be very helpful for runners and help make installing screws more straightforward. For me, I personally like the flexibility but if the configuration works, why not? (pictures below courtesy of Saucony's website - Peregrines (left) and Mad River TR (right).)
There you have it! A (probably too) in-depth "analysis" of how to make your own screw shoes and how to determine optimal screw placements when you do so. Let me know what you think and please leave any feedback on if you have tried screw shoes and what works (and doesn't work) for you!
7 Comments
12/31/2022 12:09:36 pm
Running on snow represents a feeling you cannot achieve by doing anything else. It's indeed one of the most beautiful feelings I have ever experienced. 1/17/2023 08:23:08 am
When you need to run on ice, you need screw shoes. To read the details about it was very knowledgeable. I want to buy them as well. 11/22/2023 04:03:55 am
Dan H
11/29/2023 11:21:18 pm
Nice write up. I searched specifically for this information, but did not expect to find detailed analysis! Thanks.
TheLawnfather Inc. is a reputed lawn care company providing high-quality mowing, cutting, & other lawn care services in Calgary, Alberta. Give us a call now 6/28/2024 11:13:51 am
TheLawnfather Inc. is a reputed lawn care company providing high-quality mowing, cutting, & other lawn care services in Calgary, Alberta. Give us a call now https://lawnfather.ca/residential-snow-removalhttps://lawnfather.ca/commercial-snow-removal/ 7/25/2024 08:55:04 am
TheLawnfather Inc. is a reputed lawn care company providing high-quality mowing, cutting, & other lawn care services in Calgary, Alberta. Give us a call now https://lawnfather.ca/residential-power-raking/ https://lawnfather.ca/residential-spring-cleanup/ https://lawnfather.ca/residential-snow-removal/ Leave a Reply. |
Chris NeohTrail/ultra runner, Designer, Foodie, Rock Climber, World Traveler, Triathlete, Level 1 RRCA-certified coach, NASM-Certified Personal Trainer (CPT) and Corrective Exercise Specialist (CES) ArchivesCategories |
 RSS Feed

|
Personal Trainer, Corrective Exercise Specialization
|
|
Copyright © 2020 The Growth Experience, LLC / ChrisNeohCoaching, LLC